
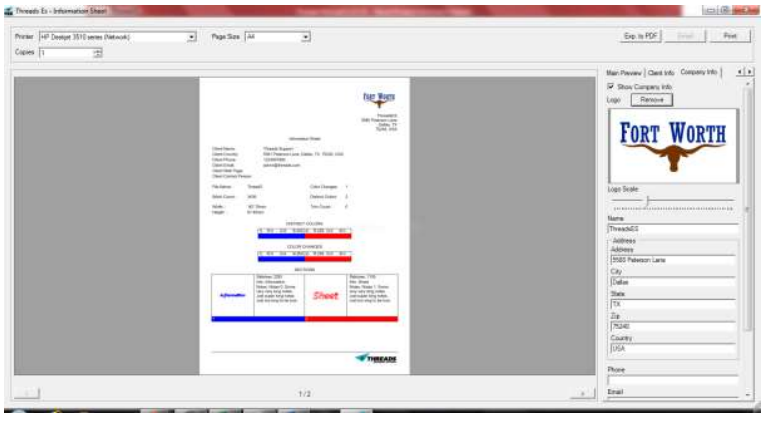
The information sheet will be found in the FILE menu. As indicated it allows users to print the project for clients. It will show all the information of the current project. On the right of the screen there are 5 tabs (MAIN, EDIT INFO, MAIN PREVIEW, CLIENT INFO, and COMPANY INFO).
The top of the screen is a section in which enables users to select the printer, number of copies and size of the page to print on. Users are also able to export it into a PDF, send it to an email or print it.
On the main window will be a preview of what will be printed
Main Tab
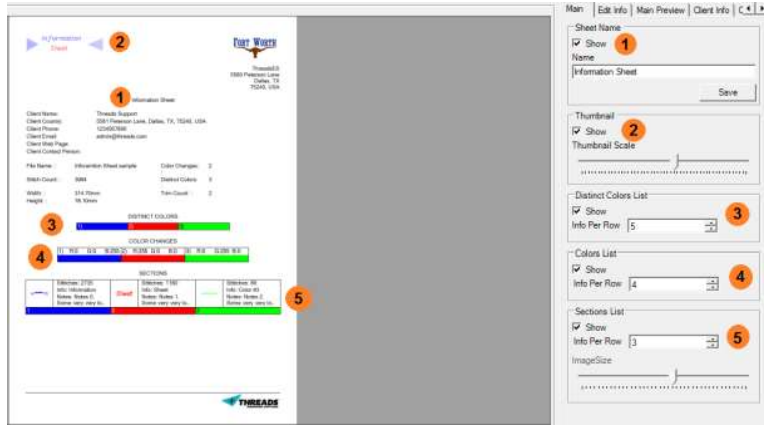
This tab contains 5 sections. Users can show or hide all or just certain sections they wish.
Sheet Name indicates the name of the project. Users are able to change the name if they require. Once the SAVE button has been clicked, the new name will appear in the preview section.
If the Thumbnail is enable, a small image of the project will appear on the top left of the sheet. User may increase or decrease the size of the image using the scroll bar, located right underneath.
The next two section refers to the colors used in the project, Distinct colors list and Colors List. If there are many colors used in the project, it may be necessary to adjust how many color may be shown per row. There is a dropdown box which enables users to select how many colors will be displayed by row.
Finally there is a Section lists, this displays all the sections of the project. Like before user are able to select how many sections are displayed by row. This sections also include a scroll bar, which enables users to modify the size of the image in the sections. In the preview area will show number of stitches, name of the section and some note.
Edit Info Tab
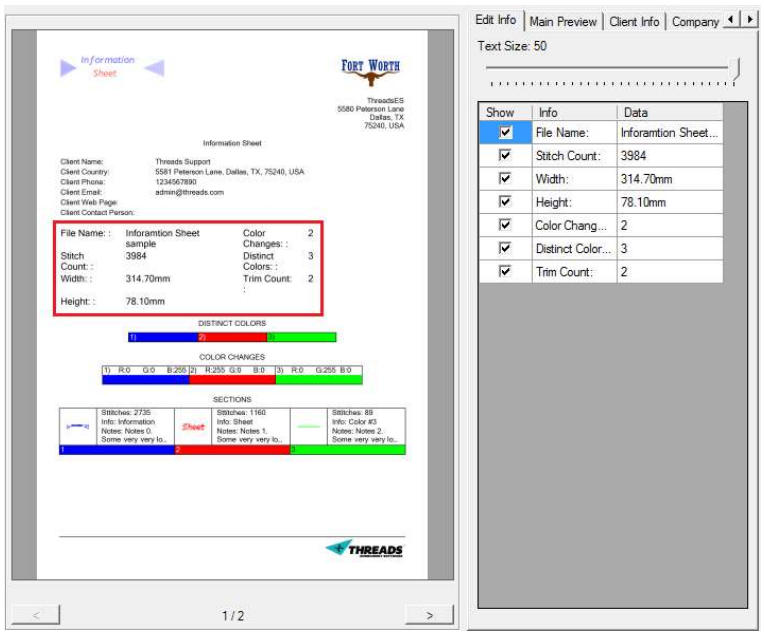
This enables users to see the name of the project, stitch count width, height, colors used and number of trims. Users can select which once to show or hide. ON the top of the top, there is a scroll bar which enables users to resize the fonts of all the attributes mentioned.
Main Preview
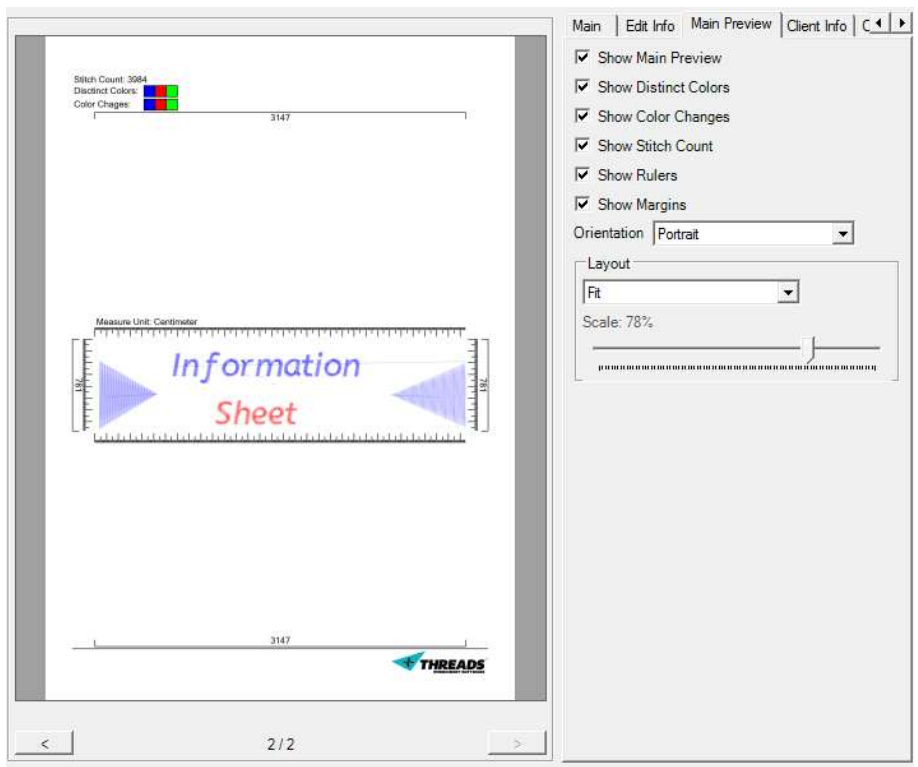
At the bottom of the page there is a page count of how many pages there is to print. The last page will be a preview of the project. The MAIN PREVIEW tab enables users to customize this page. Users can show/hide colors, number of stitches, rulers and margins of the page. If users do not wish to print this page, the first option SHOW MAIN PREVIEW will enable users to remove this page from being printed. After all the show/hide option, users can select orientation of the page.
This tab also contains a LAYOUT section. This section enables users to customize this images size. User can select to FIT to page, have 1:1 ratio or customize it. If users select to customize the images, the scroll bar will be enabled. Moving the scrollbar, users can increase or decrease the size of the image.
Client Info
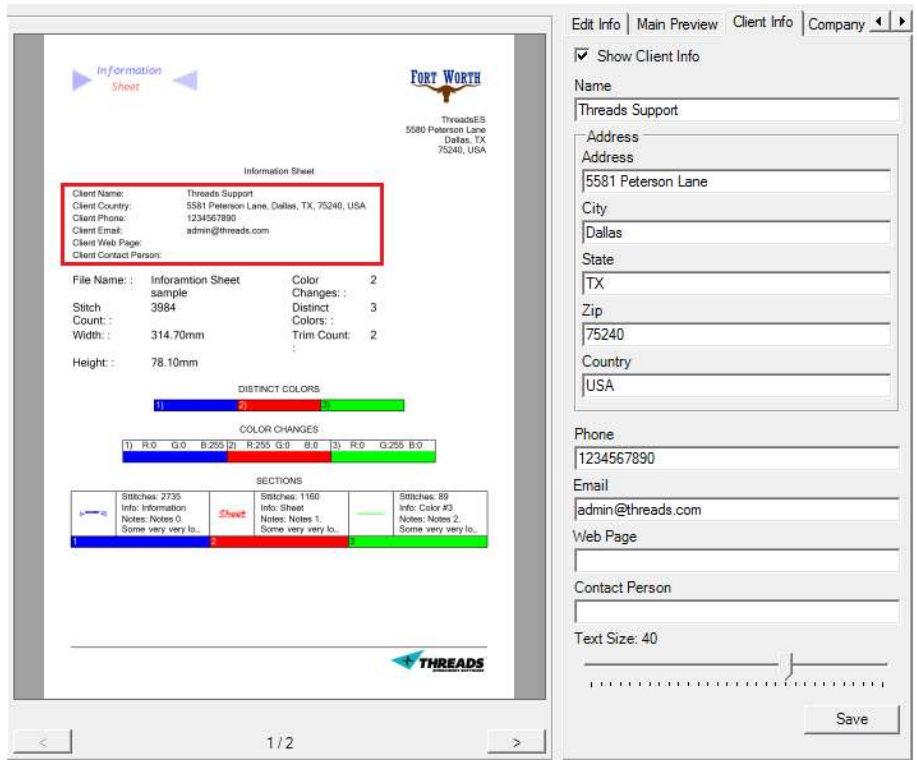
This tab enables users to enter client information. This can be client name, address, city, state, zip code country, phone number, email web page and contact person. At the bottom users can change the size of the text. This can be done by modifying the scroll bar. Once editing is done, we can save the information and it will automatically be shown in thepreview window.
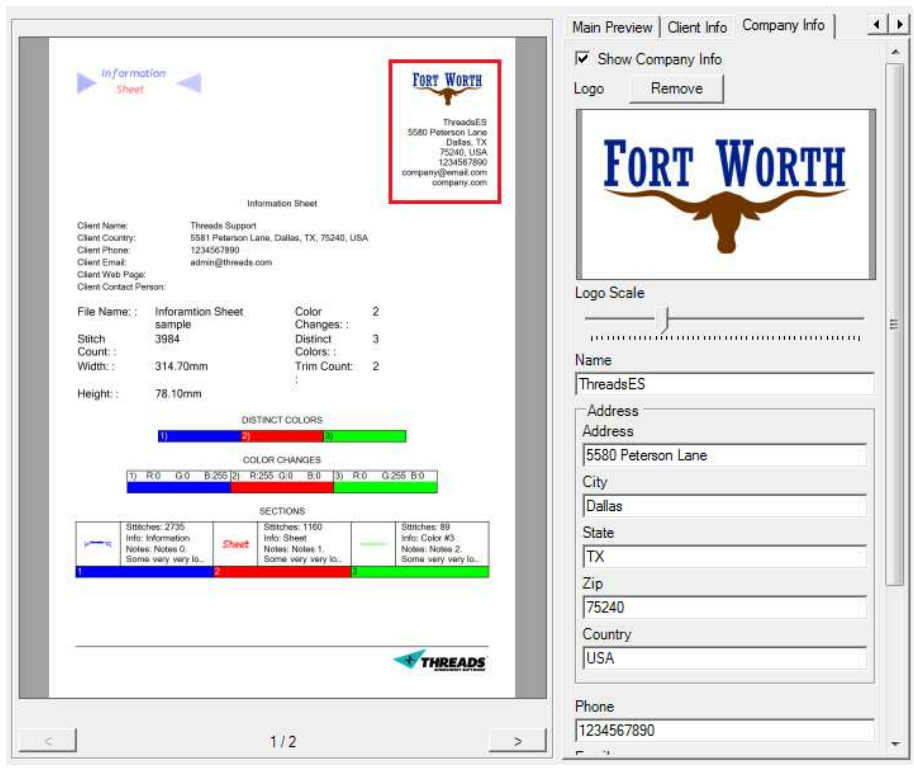
Company Info
Comments
0 comments
Please sign in to leave a comment.